
Tutorial Details
- Program: Adobe Illustrator CS3+
- Difficulty: Intermediate
- Estimated Completion Time: 1 hour
Final Product What You'll Be Creating

Step 1
To make a photo-realistic vector illustration, you pretty much have to start with a photo as a reference. I’ll be using a Creative Commons licensed photo from Flickr user echiner1. Place your source photo in your document, by going to File > Place.Step 2
Draw a rectangle next to the photo and fill it with rich black. A good rich black in CMYK is C=60, M=40, Y=40, K=100. If you’re working in RGB mode, use true black: R=0, G=0, B=0.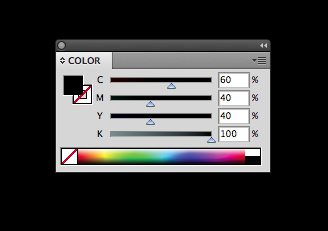
Step 3
Lock this layer and create a new one above it. Draw a rectangle the same size as the candle. Take the Eyedropper tool (I) and sample a color from the photo. This will fill your rectangle with this color.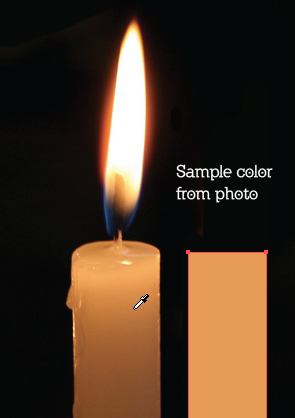
Step 4
With the rectangle selected, go to Object > Create Gradient Mesh. Enter the values shown below.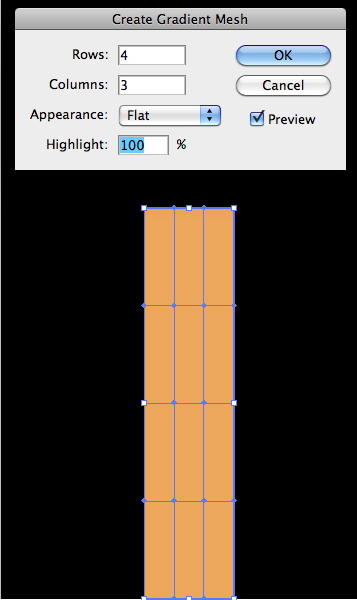
Step 5
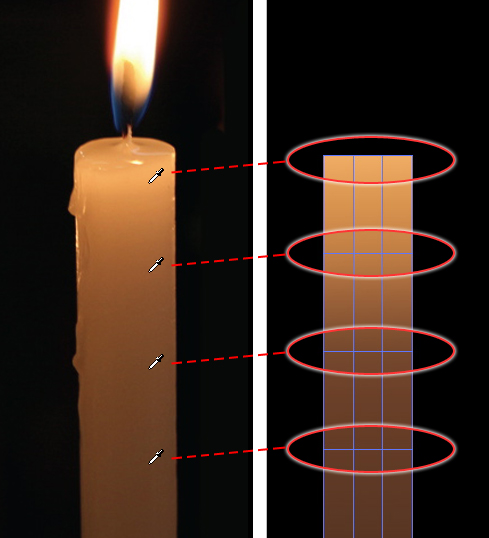
Using the Direct Selection tool (A), marquee-select the top row of points on the mesh. Switch to the Eyedropper tool, and sample the color from the corresponding part of the photo. Do this for each horizontal row of points.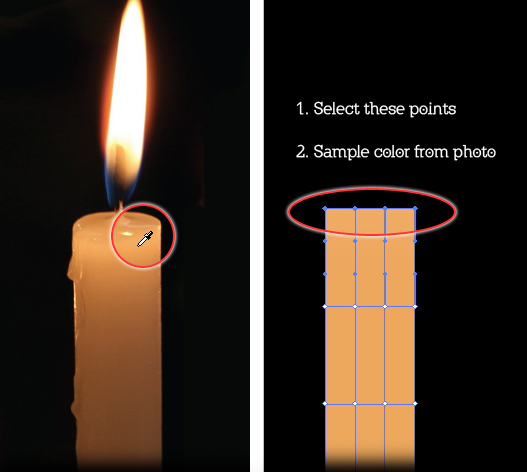
Step 6
Select one point on the right edge of the mesh and sample its corresponding color from the photo. Do the same for every point on each side. Your mesh should look something like the image below. You can adjust the colors on each point manually, using the Color panel.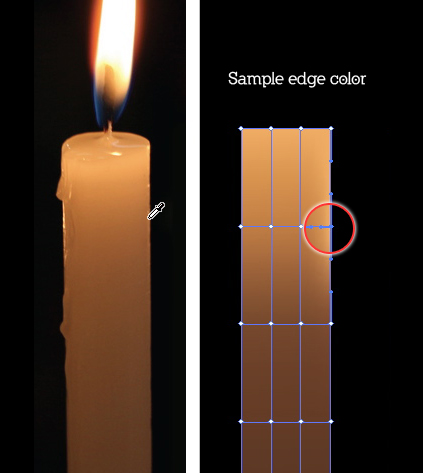
Step 7
Using the Direct Selection tool (A), select the second column of points on the mesh. It may help to view the illustration in Outline mode so you can see the points. Use the left arrow key on your keyboard to move this column of points toward the left a few clicks. This will make the highlight on the left more severe.
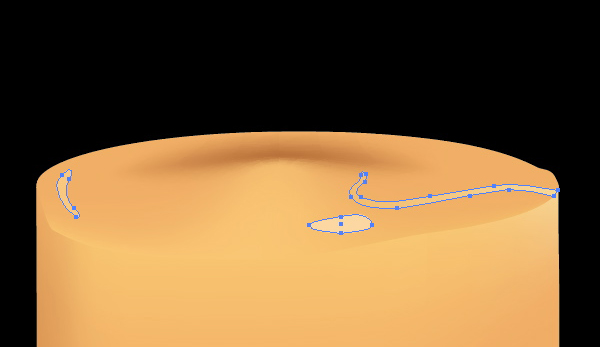
Step 8
Take the Mesh tool (U) and click on one of the vertical mesh lines. This will create a new horizontal line. Now select the points on the new line and give them the same fill color as the top points. You can do this with the Eyedropper tool. Here’s a handy method: First, choose the Direct Selection tool (A). Then switch to the Eyedropper (I). Now hold down the Command/Control key to temporarily access the Direct Selection tool. Select the points, then release the Command/Control key to go back to the Eyedropper to sample your color. Once you get in a rhythm, your Mesh work will be speedier.
Step 9
Select the middle two points on this new line and move them down. This will create a slight curve, which will help make the mesh look like a cylinder.
Step 10
For the top of the candle, draw an ellipse, and fill it with the same color as the top points on the candle mesh. Create a Gradient Mesh as before.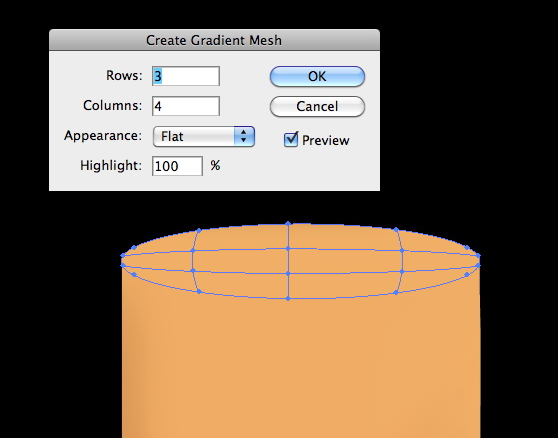
Step 11
Drag the middle point up a bit and fill it with a lighter color. You can’t normally “fill” a point, but that’s how we talk about it with Gradient Mesh. Fill the point above it with a darker color. Drag the lower points to form a less uniform, more organic shape.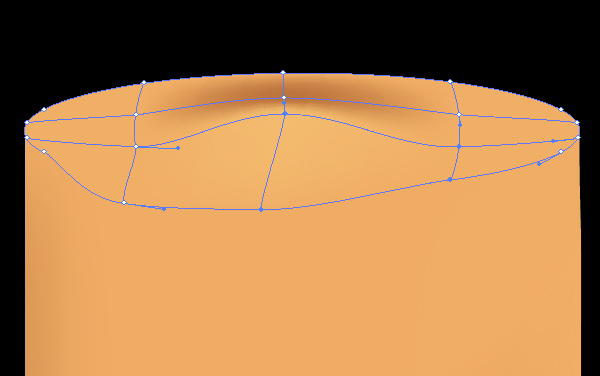
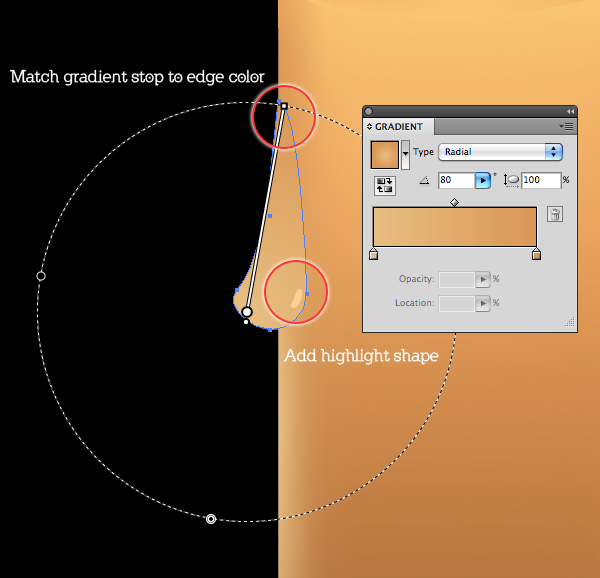
Step 12
Draw a couple of drips on the side of the candle. You can use the Pen tool or the Blob Brush, or whatever you prefer. Fill the drips with a radial gradient, taking care to match the colors so the drips appear to blend into the main candle shape.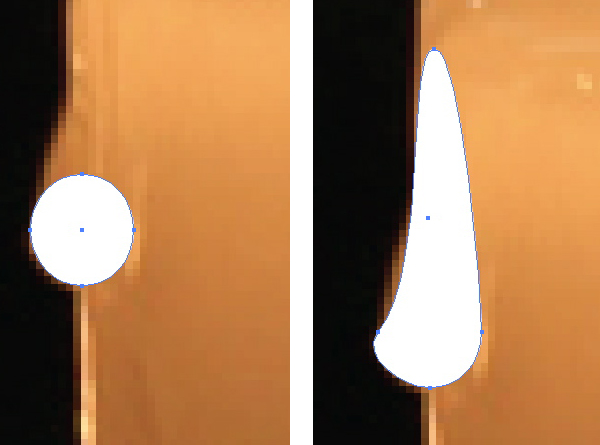
Step 13
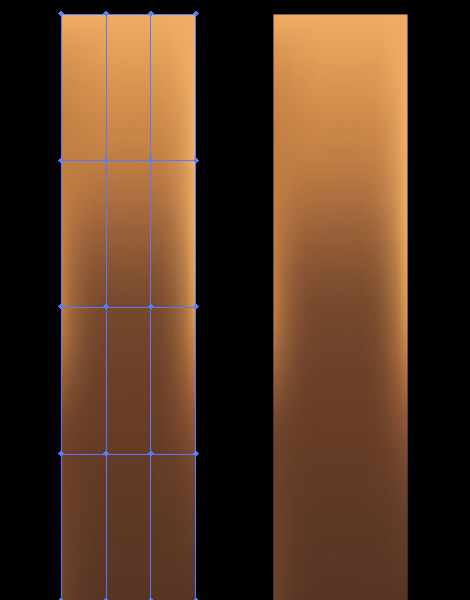
Your candle should now look like the image below.
Step 14
For the wick, draw a simple path with the Pen tool. Make it thick, with rounded end caps. Then go to Object > Path > Outline stroke to expand it. Fill with a linear gradient that goes from the candle color to a burnt brown.
Step 15
Now we’ll make the flame. First, the glow around the flame can be made with a simple Blend. Draw three ellipses, as in the image below. The outer one’s fill should match your rich black background, and the other two should be bright yellow and orange, as shown.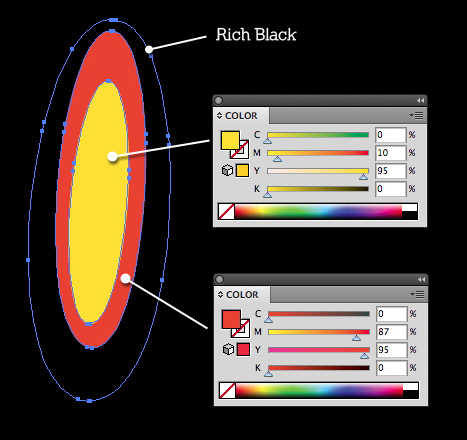
Step 16
Double-click the Blend tool to bring up its options. Make sure Smooth Color is chosen, then select the three ovals and go to Object > Blend > Make.
Step 17
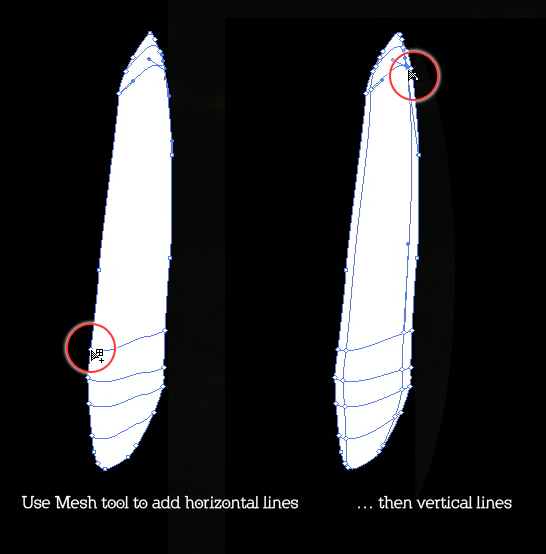
For the flame, we’ll use Gradient Mesh. Draw the outline of the flame shape, using the photo as a guide. Since the color of the flame is concentrated toward the bottom, it makes sense to create the mesh with the Mesh tool, rather than the menu item.Take the Mesh tool (U) and click about four times on the flame outline, near the bottom, to create horizontal mesh lines. Do the same with two clicks near the top. Then click a horizontal line twice, close to either side of the original path.
Step 18
As you did with the candle, sample color from the photo. Move individual mesh points to create a more organic look, and to create a shadow for the wick.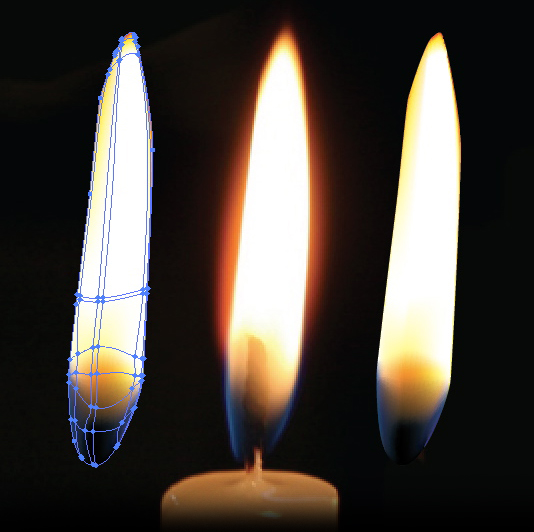

Conclusion
You don’t need a crazy amount of mesh points to make a realistic illustration. Paying careful attention to the placement of the points, their color, and their relationship to one another is the key to a successful Gradient Mesh.
No comments:
Post a Comment