
Final Image Preview
This is what we’re looking to build with this tutorial.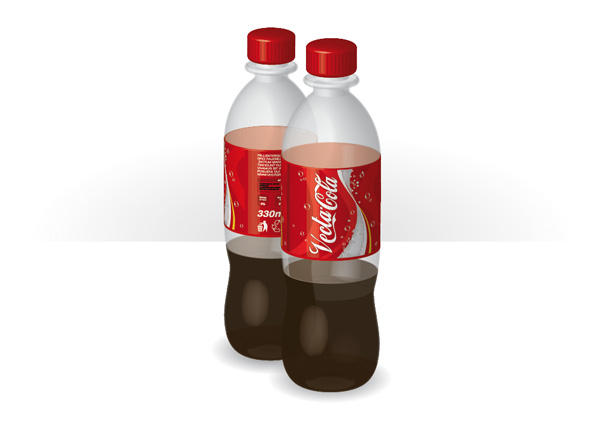
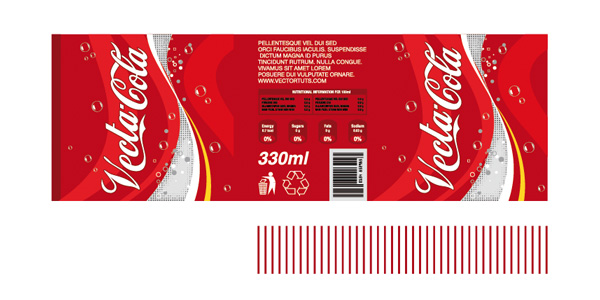
Step 1
We need two symbols for mapping to our final 3D object; a bottle label and some texture for the screw top. Make yours with similar proportions to those shown below and use whatever designs you wish. Group the label components (Objects > Group) to make a label group and also group the top texture components.One thing to bear in mind is the use of gradients within these symbols. Illustrator will rasterize gradients when applying the symbols to 3D surfaces. This is fine and may well give you the desired effect, but in doing so you’ll limit the scaleability of your final object.
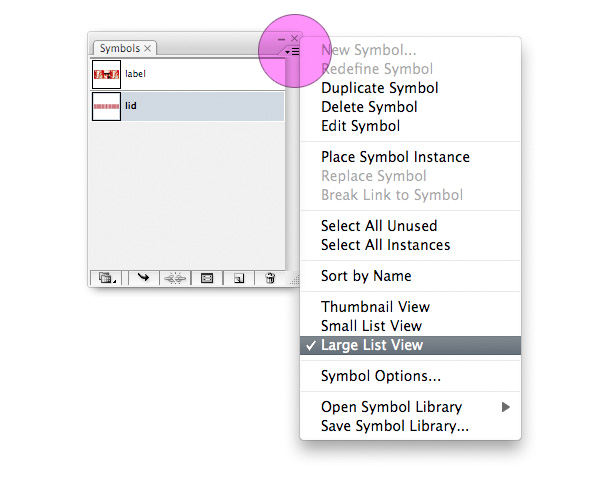
Step 2
Open the symbols panel (Window > Symbols) and drag each of the two groups into the window. Depending upon which version of Illustrator you’re using, you’ll either be presented with the Symbol Options dialogue automatically, or you may have to double-click the symbols once they’re in the panel.Either way, enter a name for each of your two symbols within the Symbol Options dialogue and click OK. You may also find it useful to display the Symbols panel as a list (as shown in the image below), which allows you to see the symbol icons plus their assigned names. Existing instances of the symbols on your artboard may now be deleted.
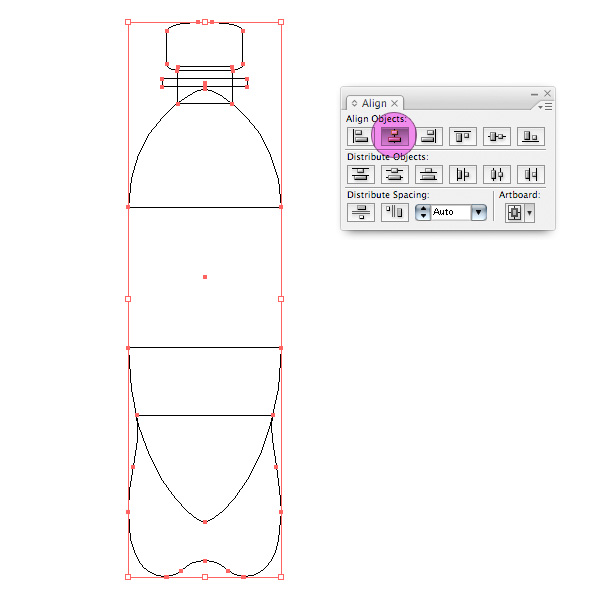
Step 3
I’m now in Outline mode (Command + Y to switch between Preview and Outline) while working with simple vectors, but you can choose which view mode you prefer.Use the various drawing tools to form the shapes needed for a silhouette of a cola bottle. Align them all centrally, but don’t worry if the whole thing isn’t perfectly symmetrical, we’re going to slice it down the middle anyway. There are many approaches to preparing shapes for revolving, this way gives you a reasonable impression of the final form before you applied the 3D effect.
Step 4
Use the Pathfinder tools to join the shapes. Then expand your shapes so you then have one complete object.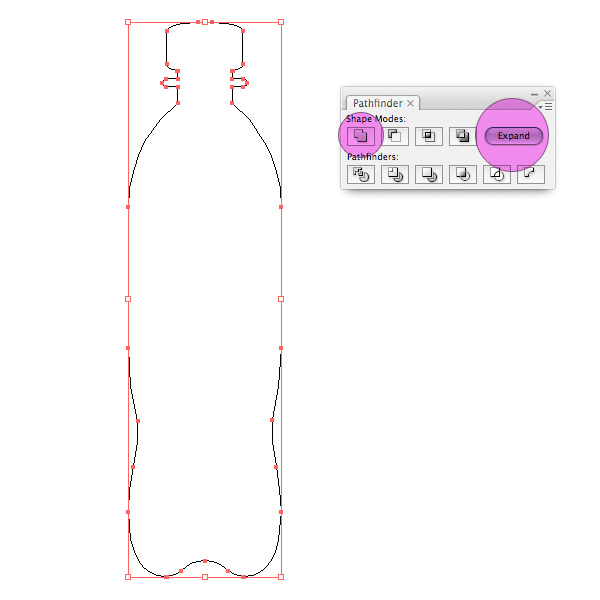
Step 5
Draw a line vertically down the middle of your bottle object. Then align the two together centrally. Now click the Pathfinder’s Divide tool and Expand the result. Your object will have been split neatly in two.Ungroup the two halves (Objects > Ungroup) and delete one of them. It makes little difference which of the two halves you delete; more on this later.

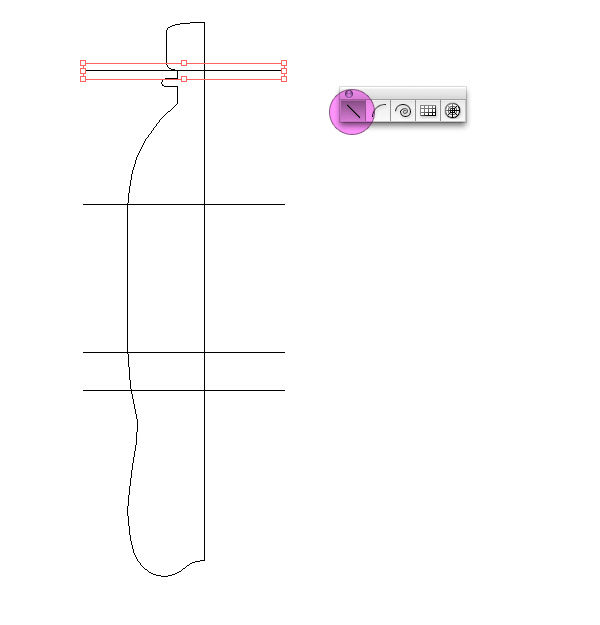
Step 6
We’re going to continue splitting our object up, this time with a series of horizontal lines. What we’re aiming for is a collection of pieces so each area of the bottle can have it’s own color and transparency properties.Start with a line to separate the bottle top from the rest, then one which will begin the label, and another for the plastic underneath the label. Continue with this method until your design matches the image shown below.
Step 7
Once again we turn to our Pathfinder Tools. You’ve no need to group the horizontal lines together, just select everything on the page and click Divide. Expand your object as you’ve done before. Then ungroup (Object > Ungroup) to release your bottle sections from each other.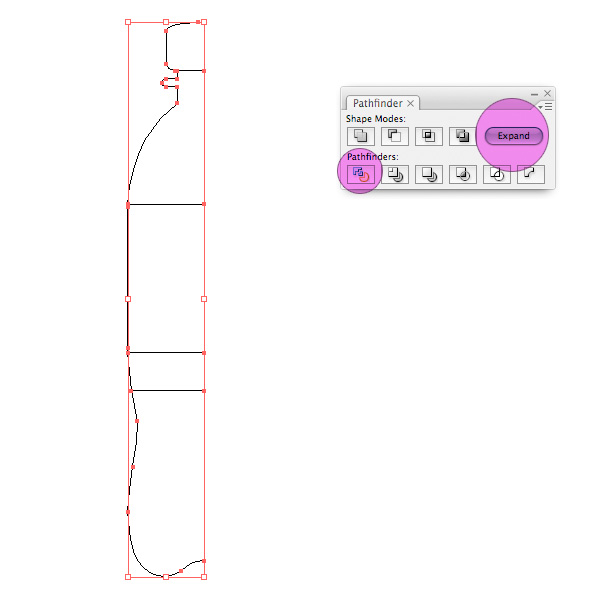
Step 8
Use the Direct Selection Tool to select four of the nodes along the edge of your object (as highlighted below). Then press Delete to remove them. This should leave you with a segmented vector defining the outer edge of half of your bottle.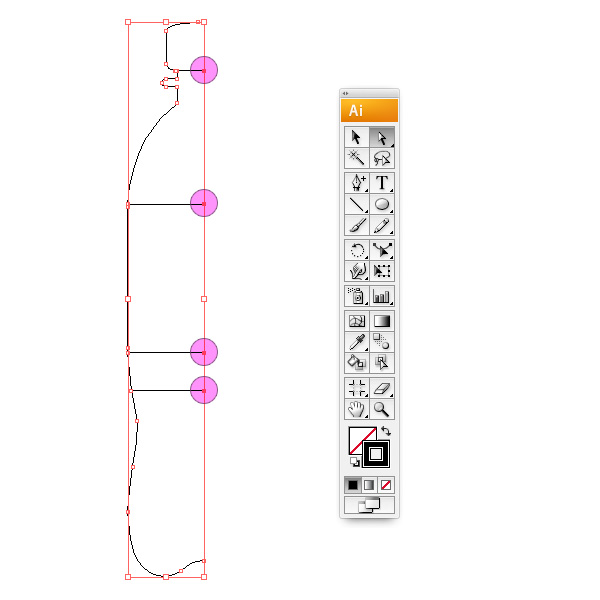
Step 9
If you’re currently working in Outline mode, switch to Preview (Command + Y) so we can determine some colors. Give each of the five bottle sections a color and leave the stroke width at it’s default of 1px (the stroke width will effectively determine the thickness of your bottle’s plastic, you may want to play around with this).
Step 10
Select all your bottle sections and group them together (Object > Group). This is a simple but crucial stage in the 3D revolving process. We want all the sections to be treated as one unit and for the effects to be applied to the group as a whole. Without grouping them, the revolve effect would be applied to each section individually, creating five random 3D objects. Try it for yourself!
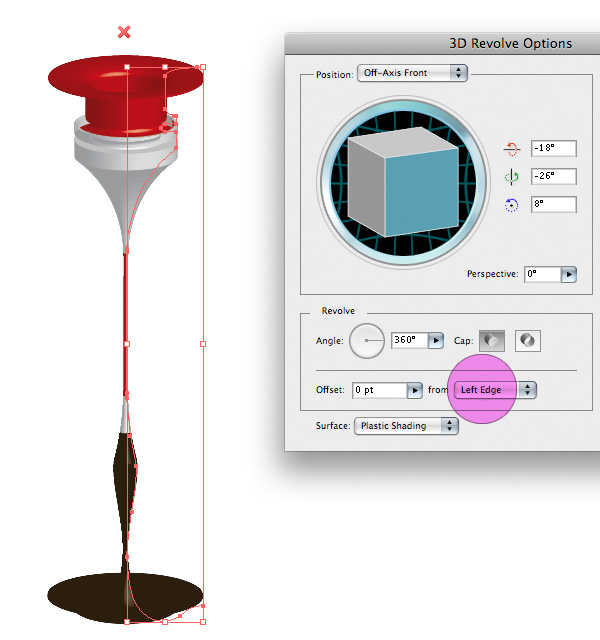
Step 11
Select your now grouped bottle vectors. Go to Effect > 3D > Revolve and click Preview in the Options dialogue that appears. You’ll be presented with a revolved 3D rendering of your vector, turned 360° around the left edge by default.This brings us back to Step 5 when I mentioned "more on this later." Well later is here now. When I split the whole bottle object into two halves I chose to delete the right hand side, leaving me with the left. If you did the same, your bottle will have rendered as below.
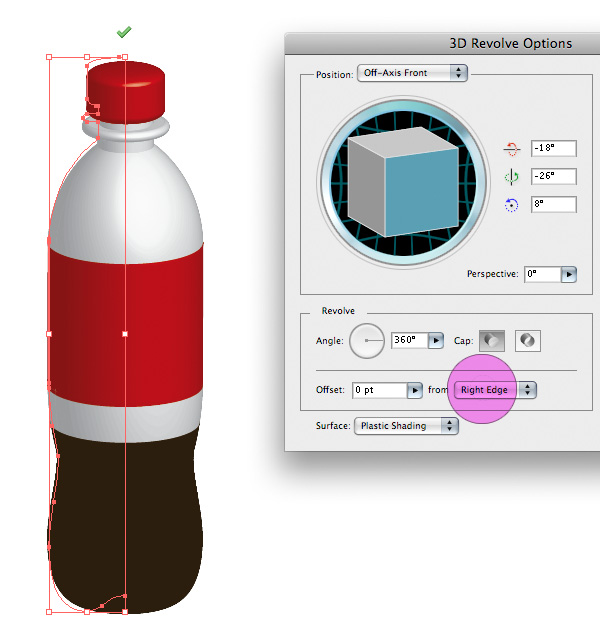
You’ll need to alter the settings so that the object is revolved around the right hand side, as shown in the second image below.
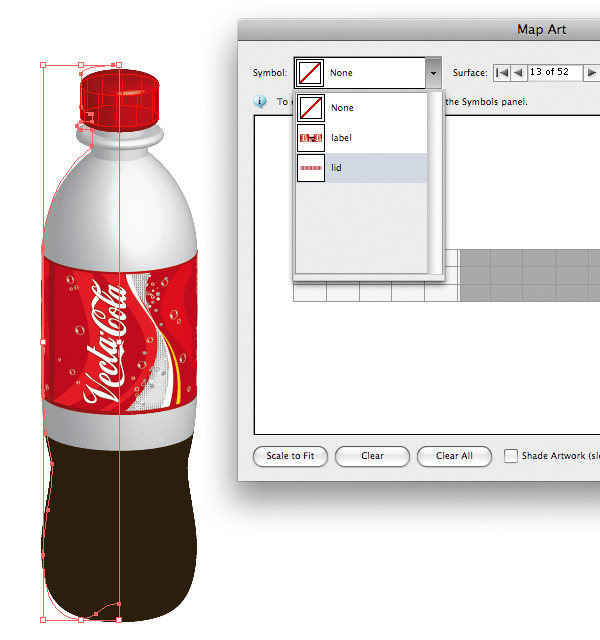
Step 12
Within the 3D Revolve Options dialogue click on Map Art, which opens the Mapping dialogue. Select the surfaces you need using the surface navigation arrows and map the appropriate symbols to them from the symbols dropdown. There will be a lot of surfaces to choose from with a complex object like this, so it may take a while to find the ones you’re after. This is particularly true when revolving a vector, as surfaces on the inside of your object can also be mapped.Click Shade Artwork then click on OK. Once back in the 3D Options dialogue, play around with the angle, perspective, and lighting (under More Options) until you’re happy with the result. Then click OK.
Step 13
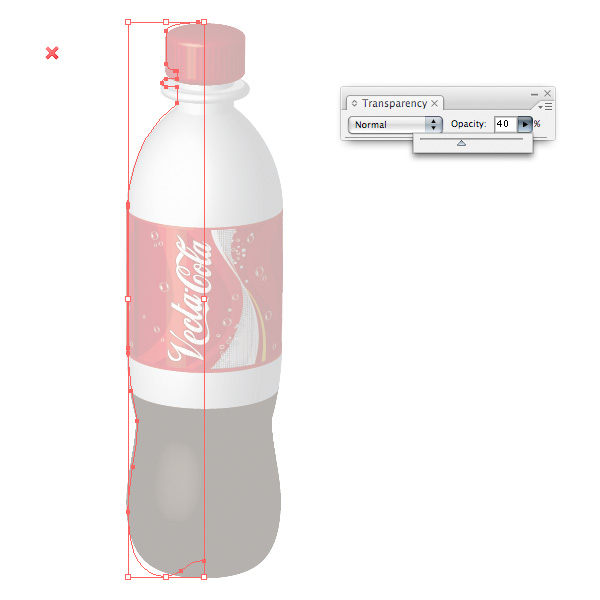
We now have a nice 3D bottle with a label and a bit of lid texture, but the plastic and the cola is opaque; we need to resolve the issue of transparency (here comes the most important part of the tutorial). There are several ways in which you may think to approach this, so I’ll first cross off the incorrect ways, and then demonstrate how it should be done.1. By selecting the 3D bottle and reducing the opacity in the transparency panel the whole object will fade. Furthermore, you won’t even be able to see the reverse side of the object, it will have been treated as a 2D image. This is because when Illustrator renders an object in 3D it first flattens the transparency of that object (see the first image below).
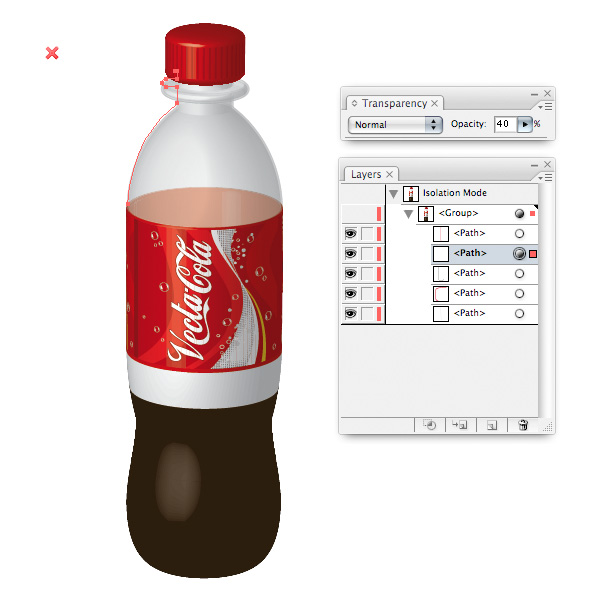
2. Instead we could expand the group in the Layers panel or double click the object to reveal the group elements. By selecting just those we need and altering their opacity we can give our bottle a transparent look (see the second image below). The correct approach! Right? Wrong!
Step 14
Technically we’ve just achieved the look we wanted, but in terms of best practices this method isn’t going to win a gold star. Illustrator has flattened the transparency of the main object (in this case the group of vectors) though now we’ve altered the properties of an object within our group. This transparency isn’t flattened and the effect works.However, imagine that we didn’t have a group. Imagine instead that we’d built a single vector to make a green glass bottle and we also wanted to apply a transparency. We wouldn’t have a group to expand, yet we’d still need to alter the transparency of an element within our vector, so this is where the third correct method comes into play.
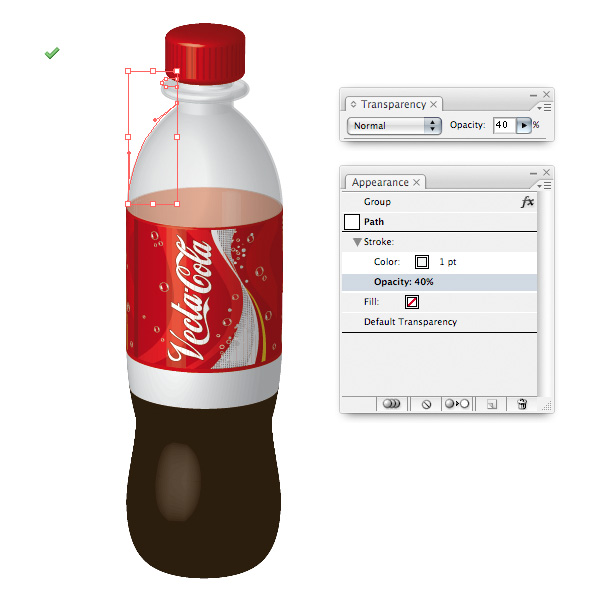
3. Open your Appearance panel (Window > Appearance) and use the Direct Selection tool to click on a vector whose transparency you wish to alter. In the Appearance panel you can now isolate this object’s stroke transparency properties. You do this by clicking on the Stroke attribute and changing the value in the transparency panel. You aren’t altering the properties of the object, but the properties of it’s stroke, which is as far down the properties hierarchy as possible! Guaranteed transparency!
Give the strokes of the plastic sections a Multiply Transparency of 40% and the stroke of the cola section a Multiply transparency of 60%.
Step 15
If you feel the bottle needs to be standing on something, make an ellipse, give it a radial gradient from 50% black to white and scale it vertically, as in the image below. Position it underneath the base of the bottle. Make another (larger) ellipse, give it a radial gradient from 20% black to white. Then Mask (Command + 7) the top half with a rectangle. Position it behind the bottle as a horizon.Unfortunately, Illustrator doesn’t (yet) cater for ambience such as dedicated 3D programs, so you’ll have to fake your own shadow.

Conclusion
There we have it! A transparent 3D plastic cola bottle! Duplicate your final bottle if you want to really demonstrate it’s transparency. Scale it to allow for distance. Bear in mind that when altering the scale of 3D rendered objects (or the stroke width, etc.) your image mapping may need to be reapplied. It’s likely that your surfaces will have been assigned different numbers and that your symbols are attached in different places.
No comments:
Post a Comment